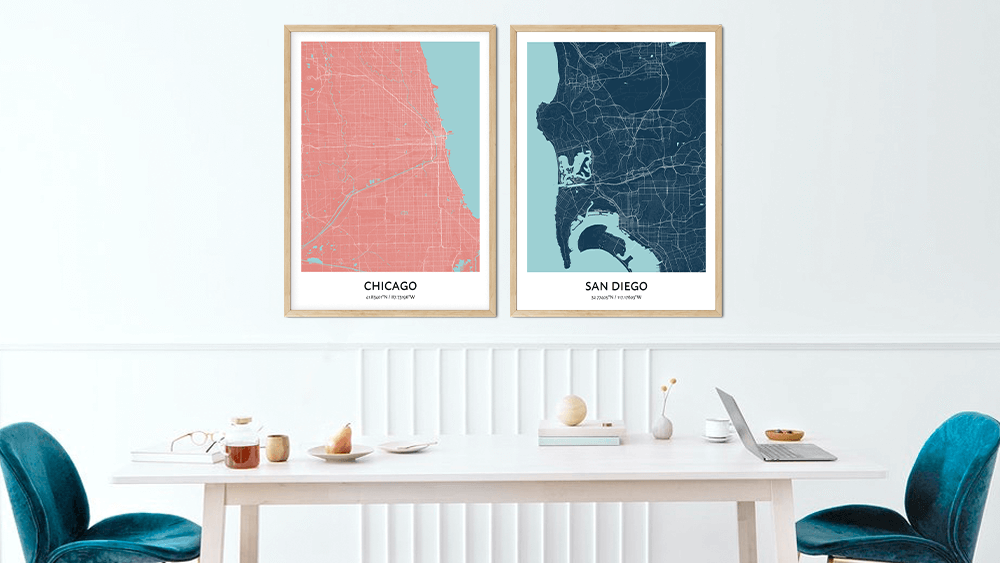
Craving unique wall art for your home, office, or as a gift? You are in the right place at Positive Prints! Feel inspired by designing a custom city map print of a city that holds a special place in your memories.
Use this guide to create your custom city map print, step by step. Once you’re done, you can expect a high-quality poster designed by you that’s perfect for yourself or as a gift to someone.
Step 1: Select Your Design
With positiveprints.com, you can customise your design to make it significant. Start by selecting the desired design, as shown below:
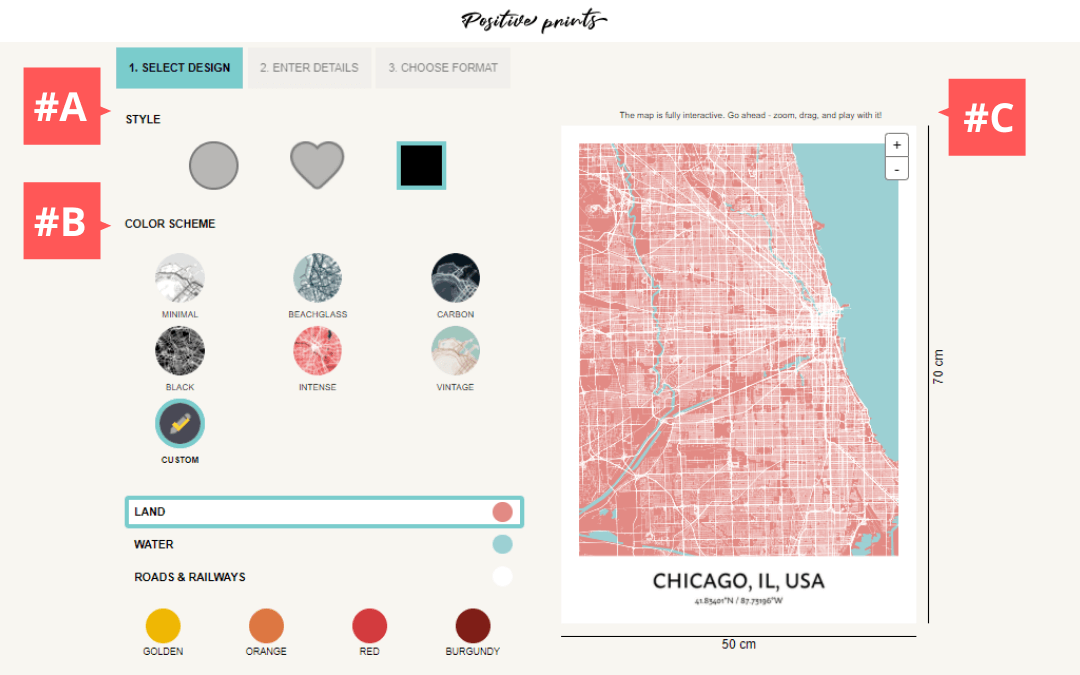
#A: There are three map shapes to choose from for your custom city map print – circle, heart, or square. Depending on the purpose of personalised poster, you can choose the perfect style for the occasion. The most frequently selected style is square, which is fitting for any occasion. You can only make one choice per poster.
#B: This is the colour design for your poster. You can select one of the pre-designed colours that are created by us or you can also customise the colour of the land, water, and roads and railways.
#C: This is the map customisation feature. You can click and drag the poster in different directions to find just the right spot. You can also tap on the image and then use the + and – feature to zoom in and out.
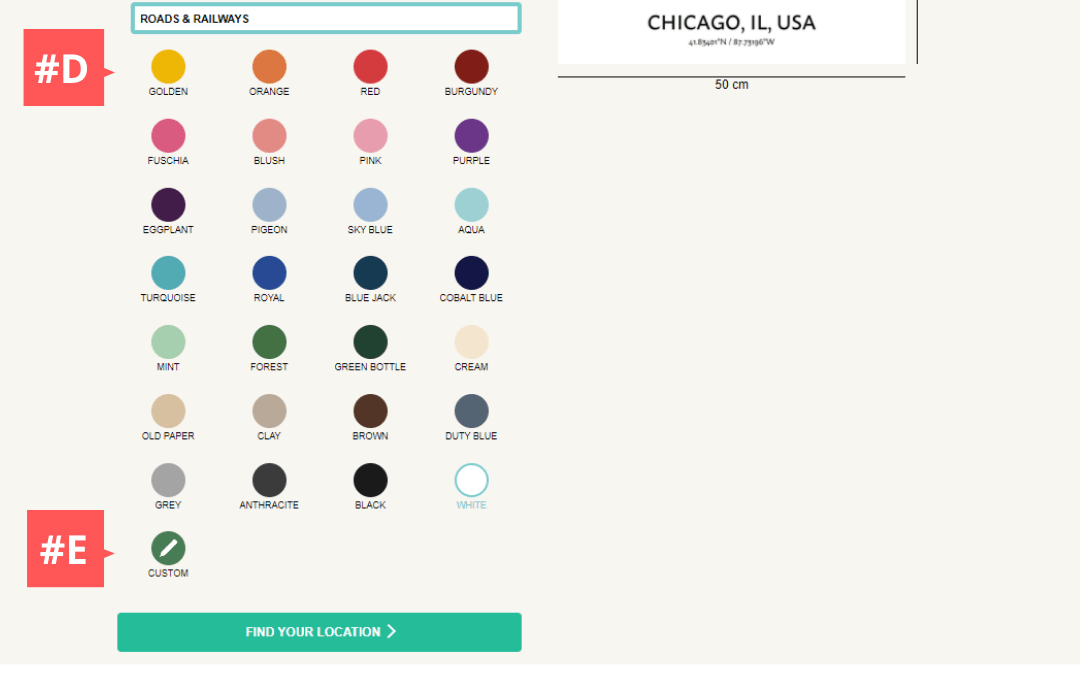
#D: This is the variety of the choices to use when you choose to customise your colours. You can select one colour each for roads, water, and land.
#E: Here is the feature you can use to set your unique colour scheme if the above colours do not meet your specifications or taste. Drag the cursor in the coloured box to find your perfect shade.
Once you have made all the adjustments on the style and colour scheme of your poster, click the Find your Location button to go to the next step.
Step 2: Enter Details
Selecting a custom city map print can be difficult. Clients have different locations in which they wish to have posted. It would be best if you made a choice in which you have memorable moments at the place.
Finding a specific location for your wall art poster starts by filling in your unique details to make your map with positive prints. Use the image below to find your special place:
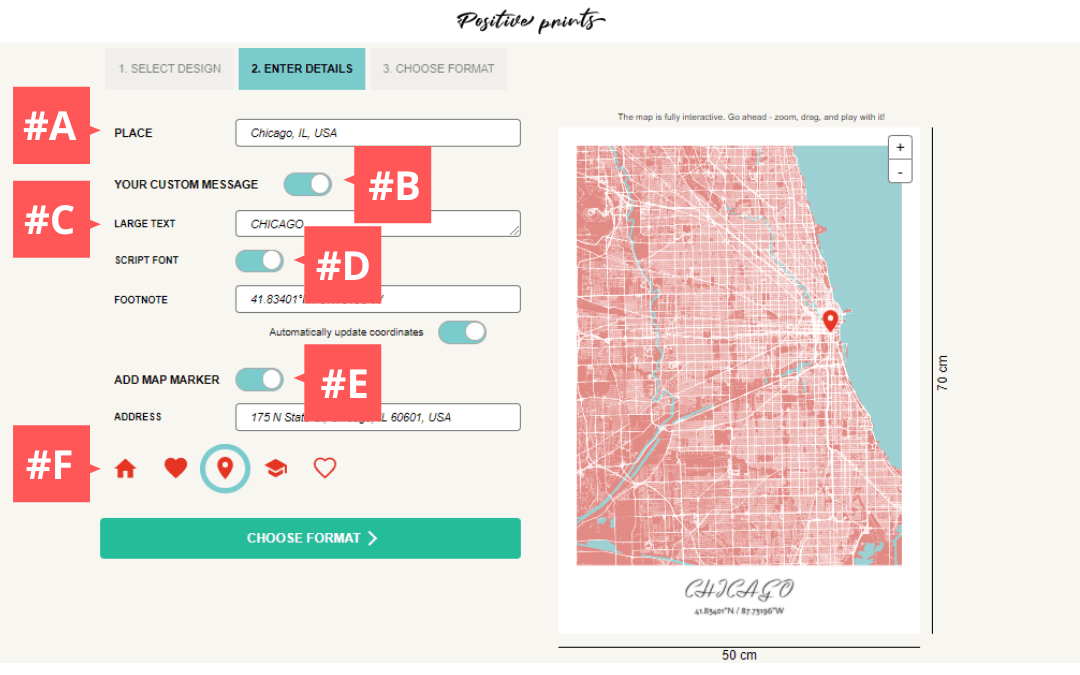
#A is the location of your custom map print. Search engine optimisation is used to help you choose the best fit of the location you want the print to have.
#B is all about your unique message. If you wish to include a specific message, enable the button to write out your custom text.
#C refers to the top line of text printed at the bottom of the poster. It automatically populates based on what you type on this line.
#D gives you the option to choose a Script font. Upon enabling the button, the text on your print will automatically turn into a scripted Italic headline.
#E enables the Add Map Marker feature. You can pinpoint a specific location on your map by adding an address. The mapping tool will automatically find that point and drop a location pin.
#F allows you to choose what your Map Marker looks like. Choose from a house, heart, graduation cap, or a pin
All details are filled in and accurate. Click the Choose Format button to go to the next step.
Step 3: Choose Format of your Custom City Map Prints Wall Art
You’re almost done creating your custom map print wall art! On Step 3, you will choose the physical appearance of your poster. Each design has different specifications, so play around with the tools to find the best fit for you.
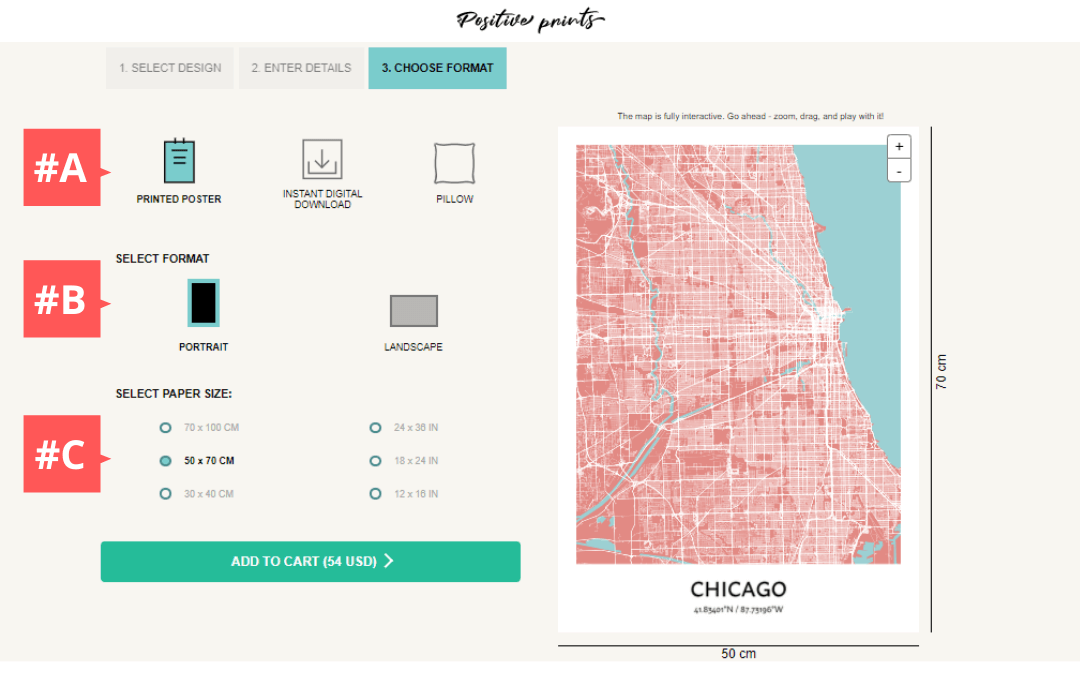
#A: You can either choose a hardcopy printed poster, or, you can opt to download the poster as an instant digital download. The third option is to turn your custom map into a pillow design.
#B: Select the best orientation (portrait or landscape) for your custom city map print. This will determine how your poster is displayed once you receive your print or print your own. If you have selected a digital download, you will also see an option for a square orientation.
#C: Different individuals choose different paper size dimensions, depending on the type of print they wish to have.
After you’ve made your selections, click the Add to Cart button to finish the checkout process.
Step 4: Preview, Edit, and Finish your Wall Art
Once you have added the custom city map print to the cart, there are just a few small details standing between you and submitting your order.
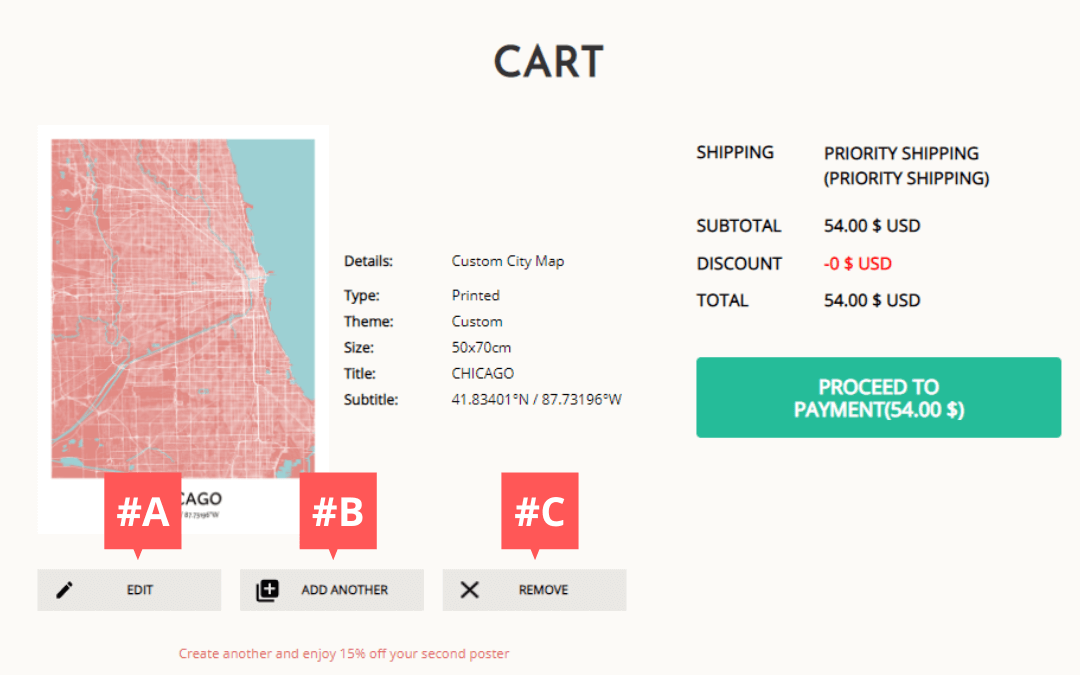
#A: Preview all of your order details. In case you need a modification, click the Edit button to make the changes and submit the updated version of your product.
#B: If you have more than one print you wish to include in your order, click the Add Another button to create an additional print. Clicking this button will take you back through the process.
#C: You have the option of removing any extra prints you might have accidentally added to the cart.
Last step! Once your cart is complete, click the Proceed to Payment button to complete your checkout.
We hope you found our guide and the images to be helpful when designing your custom city map print and turn you into a delighted Positive Print client!
Much regards and appreciation!
The Positive Prints Team
PS – Ready to get started? Click the DESIGN YOURS NOW button and start designing your custom city map print!


